Learn how to launch Kubernetes in Microsoft Azure, Google Cloud, and Amazon Web Services in this article by Russ McKendrick.
An experienced system administrator who has been working in IT and related industries for over 25 years, and Scott Gallagher, a Microsoft, Linux, Docker, and cloud enthusiast.
This article looks at how easy is it to launch a Kubernetes cluster in the three main public clouds, starting with Microsoft Azure.
Azure Kubernetes Service
The Azure Kubernetes Service (AKS) is an extremely simple service to launch and configure. You can use the command-line tools using the Azure Cloud Shell which is built into the Azure Portal. The first thing to do is create a resource group to launch your AKS cluster into. To create one called MasteringDockerAKS, run the following command:
$ az group create --name MasteringDockerAKS --location eastus
Now that you have the resource group, launch a two node Kubernetes cluster by running the following command:
$ az aks create --resource-group MasteringDockerAKS \
    --name MasteringDockerAKSCluster \
    --node-count 2 \
    --enable-addons monitoring \
    --generate-ssh-keys
It will take several minutes to launch the cluster. Once launched, copy the configuration so that you can interact with the cluster using your local copy of kubectl. To do this, run the following command:
$ az aks get-credentials \
    --resource-group MasteringDockerAKS \
    --name MasteringDockerAKSCluster
This will configure your local copy of kubectl to talk to the AKS cluster you have just launched. You should now see the cluster listed in the Docker menu under Kubernetes:

Running the following commands will show you the version of the server that your kubectl client is talking to as well as details regarding the nodes:
$ kubectl version
$ kubectl get nodes
You can see the output of the preceding commands in the following screenshot:

Now that you have your cluster up and running, you need to launch something. Luckily, there is an excellent open source microservices demo from Weave which launches a demo shop that sells socks. To launch the demo, simply run the following commands:
$ kubectl create namespace sock-shop
$ kubectl apply -n sock-shop -f
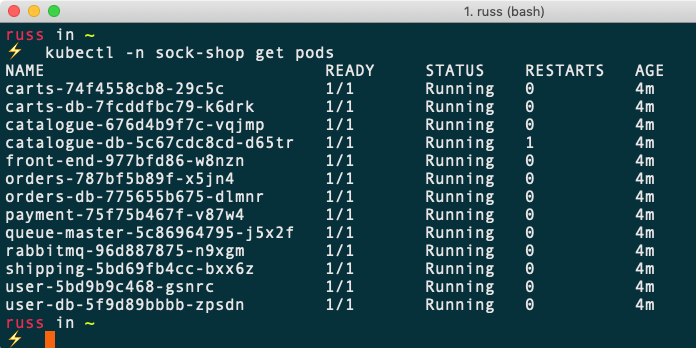
It will take about five minutes for the demo to launch. You can check the status of the pods by running the following command:
$ kubectl -n sock-shop get pods
Once everything is up and running, you should see something as follows:

Now that your application has launched, you need a way to access it. Check the services by running the following command:
$ kubectl -n sock-shop get services
This shows you that there is a service called front-end. Create a Load Balancer and attach it to this service. To do this, run the following command:
$ kubectl -n sock-shop expose deployment front-end --type=LoadBalancer --name=front-end-lb
You can check the status of the Load Balancer by running the following commands:
$ kubectl -n sock-shop describe services front-end-lb
$ kubectl -n sock-shop get services front-end-lb
Once launched, you should see something as follows:

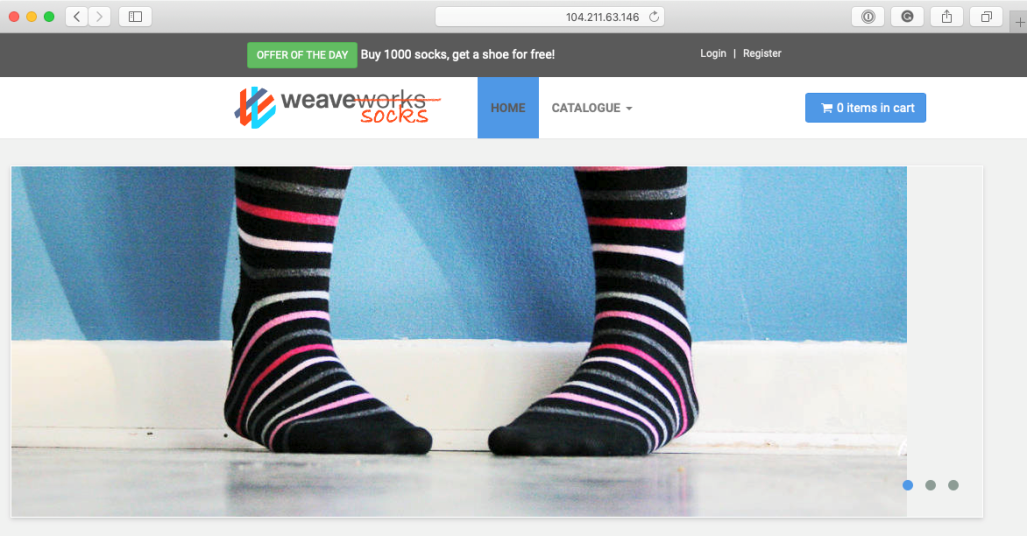
As you can see from the preceding output, the IP address was 104.211.63.146 and the port was 8079. Opening http://104.211.63.146:8079/ in a browser presents the following page:

Once you have finished clicking around the store, you can remove it by running the following command:
$ kubectl delete namespace sock-shop
To remove the AKS cluster and resource group, run the following commands:
$ az group delete --name MasteringDockerAKS --yes --no-wait
Remember to check that everything has been removed from the Azure portal as expected to avoid any unexpected charges. Finally, you can remove the configuration from your local kubectl configuration by running the following:
$ kubectl config delete-cluster MasteringDockerAKSCluster
$ kubectl config delete-context MasteringDockerAKSCluster
Next, take a look at launching a similar cluster in Google Cloud.
Google Kubernetes Engine
The Google Kubernetes Engine, as you may have already guessed, is very tightly integrated into Google's Cloud platform. Rather than going into more detail, dive straight in and launch a cluster. It is assumed that you already have a Google Cloud account, a project with billing enabled, and finally the Google Cloud SDK installed and configured to interact with your project.
To launch the cluster, simply run the following command:
$ gcloud container clusters create masteringdockergke --num-nodes=2
Once the cluster has been launched, your kubectl config will be automatically updated and the context will be set for the newly launched cluster. You can view information on the nodes by running the following:
$ kubectl version
$ kubectl get nodes
Now that you have your cluster up and running, launch the demo shop by repeating the commands used last time:
$ kubectl create namespace sock-shop
$ kubectl apply -n sock-shop -f
$ kubectl -n sock-shop get pods
$ kubectl -n sock-shop get services
$ kubectl -n sock-shop expose deployment front-end --type=LoadBalancer --name=front-end-lb
$ kubectl -n sock-shop get services front-end-lb
Again, once the front-end-lb service has been created, you should be able to find the external IP address port to use:

Entering these into a browser will open the store.
To remove the cluster, simply run the following:
$ kubectl delete namespace sock-shop
$ gcloud container clusters delete masteringdockergke
This will also remove the context and cluster from kubectl.
Amazon Elastic Container Service for Kubernetes
The final Kubernetes service is the Amazon Elastic Container Service for Kubernetes, or Amazon EKS, for short. This is the most recently launched service of the three services. In fact, you could say that Amazon was very late to the Kubernetes party.
Unfortunately, the command-line tools for Amazon are not as friendly as the ones used for Microsoft Azure and Google Cloud. Because of this, use a tool called eksctl, which was written by Weave, the same people who created the demo store. You can find details on eksctl and also the Amazon command-line tools.
To launch your Amazon EKS cluster, run the following command:
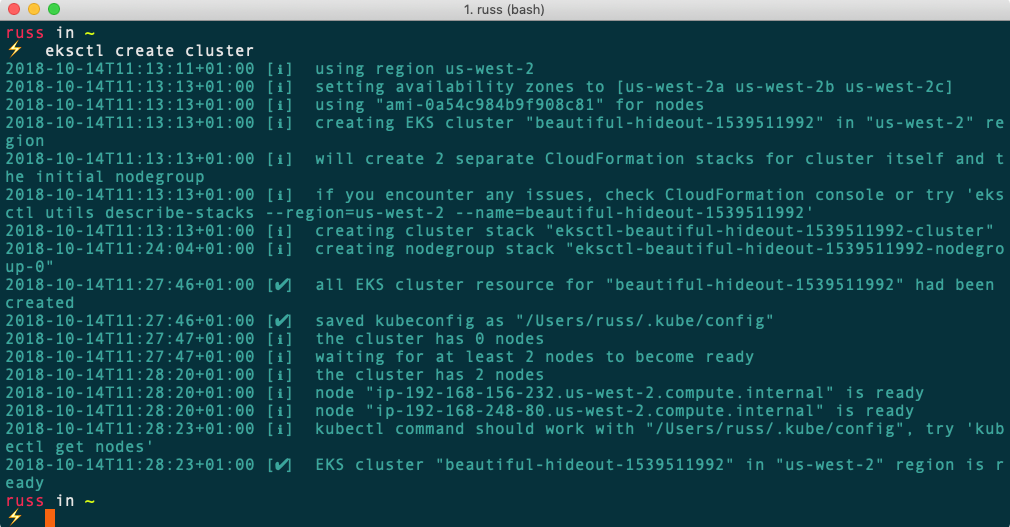
$ eksctl create cluster
It will take several minutes to launch the cluster, but you’ll receive feedback on the command line throughout the process. Also, as eksctl is using CloudFormation, you can also check its progress in the AWS Console. Once complete, you should see something as follows:

As a part of the launch, eksctl will have configured your local kubectl context, which means that you can run the following:
$ kubectl version
$ kubectl get nodes
Now that you have the cluster up and running, launch the demo store:
$ kubectl create namespace sock-shop
$ kubectl apply -n sock-shop -f
$ kubectl -n sock-shop get pods
$ kubectl -n sock-shop get services
$ kubectl -n sock-shop expose deployment front-end --type=LoadBalancer --name=front-end-lb
$ kubectl -n sock-shop get services front-end-lb
You may notice that the external IP that's listed when running that last command looks a little strange:

This is because it is a DNS name rather than an IP address. To find the full URL, you can run the following command:
$ kubectl -n sock-shop describe services front-end-lb
Entering the URL and porting into a browser will show the demo store.
To remove the cluster, run the following commands:
$ kubectl delete namespace sock-shop
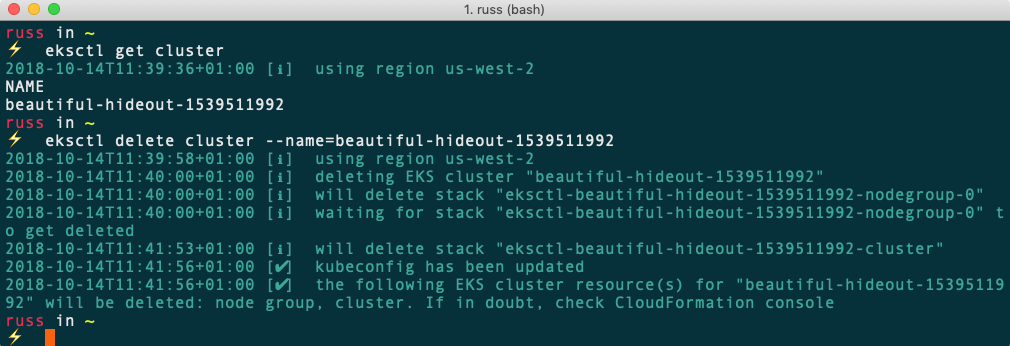
$ eksctl get cluster
This will return the names of the clusters that are running. Once you have the name, run the following command, making sure to reference your own cluster:
$ eksctl delete cluster --name=beautiful-hideout-1539511992
Your terminal output should look as follows:

Kubernetes summary
This concludes a brief look at Kubernetes in Microsoft Azure, Google Cloud, and Amazon Web Services. You can even run the demo store locally using Docker, with exactly the same commands. Just start your Kubernetes cluster; make sure that you have the local Docker context selected, and then run the following commands:
$ kubectl create namespace sock-shop
$ kubectl apply -n sock-shop -f
$ kubectl -n sock-shop get pods
$ kubectl -n sock-shop get services
$ kubectl -n sock-shop expose deployment front-end --type=LoadBalancer --name=front-end-lb
$ kubectl -n sock-shop get services front-end-lb
As you can see from the following output, the load balanced IP, in this case, is localhost. Opening your browser and entering http://localhost:8079 will take you to the store.
You can remove the store by running the following command:
$ kubectl delete namespace sock-shop
This level of consistency across multiple providers and even local machines hasn't really been achievable before without a lot of work and configuration or via a closed source subscription-based service.
If you found this article interesting, you can explore Mastering Docker - Third Edition to master Docker and leverage its power in your day-to-day workflow. Mastering Docker - Third Edition demonstrates how to use Docker more effectively and helps you rethink and reimagine what's possible with it.